iPhone Dual Boot / Jailbreak
Brought to you by NerveGas, planetbeing, ghost_000, dinopio, bgm, MuscleNerd and the iPhone-Elite and iPhone/iTouch Dev teams.OVERVIEW
The dev team has been using dual-booting to jailbreak the iPhone for several
months now, however now that several more advanced techniques have been
developed (many of which are still private), I thought it apropos to release
this cool hack for those who would like to dual boot multiple versions of
the iPhone software (or other OS's) from their handset. It's a neat little
hack that I think might be useful for developers playing with 1.2, which
appears to disable the radio (phone calls).
I'll walk you through a sample jailbreak scenario with 1.1.4, using 1.1.1, to
show you what I mean. To do this, you will carve out a new partition on the
iPhone and install version 1.1.1 on it. You'll then upgrade the iPhone to
v1.1.4, which will leave the new partition intact. You can then dual-boot
the iPhone, allowing you to mount 1.1.4's partition using the 1.1.1 partition.
Once mounted, you'll make some changes to the mount points and install OpenSSH.
Once you've got two versions of the OS functional, you can easily switch
between them by changing your root-device. For example:
nvram boot-args="rd=disk0s3 -v"
DISCLAIMER
The following instructions can result in PERMANENT, IRREPARABLE DAMAGE to your
iPhone. This information is provided WITH NO WARRANTIES. All liability is
DISCLAIMED.
In all reality, using 'restore' should fix any problems, but if it doesn't then
this clever disclaimer ensures that it's not my fault.
STEP 1: Downgrade iTunes, if necessary
As of the time of this writing, iPHUC did not work with iTunes 7.6. I'm not
sure if they've updated this or not, but for now I am assuming that your
version of iPHUC iwll probably be same.
If this is still the case, you'll need verson 7.5 or earlier. If
necessary, back up your ~/Music/iTunes library and delete iTunes.
On OS X, you can do that with:
# rm -rf /Applications/iTunes.app
# rm -rf /System/Library/PrivateFrameworks/MobileDevice.framework
# mv ~/Music/iTunes ~/Music/iTunes.7.6
Now download and install iTunes v7.5.
STEP 2: Set up iPHUC
If you need iPHUC, grab it from the 1.1.2-Jailbreak archive here:
http://conceitedsoftware.com/iphone/site/112jb.html
Unzip it, then unzip jailbreak.jar, and this should extract iPHUC.
NOTE: Many other versions of iPHUC are incompatible, we recommend using
this version, unless you have a newer one.
STEP 3: Downgrade (or Upgrade) iPhone software, if necessary
You must start from an already jail-broken version of iPhone software, either
1.1.1 or later. Version 1.0.x will not work here unless you have an
iPhone from approximately week 45 or earlier. If you are running 1.1.4,
you'll want to downgrade back to 1.1.1. See Erica Sadun's blog post on
downgrading:
http://www.tuaw.com/2008/01/16/downgrading-your-1-1-3-iphone-or-ipod-touch/
If you're running 1.0.x, you'll need to upgrade to 1.1.1 unless you own
an "early" iPhone.
Once you're up and running on 1.1.1, use the *#307# hack to break into a
Safari session and install AppSnapp from http://www.jailbreakme.com. This
will activate your phone and place the installer on SpringBoard.
Some decent instructions are here:
http://www.pantsland.com/2007/12/03/simple-iphone-112-upgrade-instructions-with-unlock/
Install the BSD subsystem and SSH using AppTapp to access 1.1.1.
STEP 4: Install necessary tools from 1.1.1 ramdisk:
Grab the following files from the 1.1.1 or 1.0.2 ramdisk:
fdisk
newfs_hfs
fsck_hfs
mount_hfs
umount
NOTE: Only the version of fdisk on the ramdisk appears to work on the
iPhone. If you have the wrong version, fdisk will complain that it can't
recognize the device.
Install the binaries from the ramdisk into /usr/sbin on your 1.1.1 device,
using scp. Then make them executable:
# chmod 755 /usr/sbin/*
STEP 5: Prepare the partition table
Here, we'll be resizing the /private/var partition and create a third
partition, disk0s3. This will blow away /private/var, so the first thing
you need to do is create a backup of it. Your resulting /private/var
partition will be 300MB smaller in size. If you choose to, you may
put things back later on - although there is some value in keeping your
iPhone dual-bootable.
# tar -cf /private.tar --preserve /private/var # (ignore the errors)
Now unmount it:
# umount -f /private/var
Next, run fdisk:
# fdisk -e /dev/disk0
If you get an error with the command above, it's because you've invoked
a version of fdisk other than the one that came on the ramdisk. If
this is the case, use the full path to wherever you placed the ramdisk
version of fdisk.
You'll edit partition 2 to decrease its size by the number of cyliners that
s1 is + the delta size between s1 and s2 (usually 120 or 123). For iPhone,
this is likely 153720 cylinders. Next, edit partition 3 to begin using the
same spacing as partitions 1 and 2 (though this may not be necessary) and
to be the same size as as partition 1 (153600 on iPhone, 76800 on iPod).
The final table will look something like:
4GB iPhone:
Disk: /dev/disk0 geometry: 983/32/63 [1982464 sectors]
Sector size: 2048 bytes
Signature: 0xAA55
Starting Ending
#: id cyl hd sec - cyl hd sec [ start - size]
------------------------------------------------------------------------
1: AF 0 1 1 - 1023 254 63 [ 63 - 153600] HFS+
2: AF 1023 254 63 - 1023 254 63 [ 153663 - 1674861] HFS+
3: AF 1023 254 63 - 1023 254 63 [ 1828644 - 153600] HFS+
4: 00 0 0 0 - 0 0 0 [ 0 - 0] unused
8GB iPhone:
Disk: /dev/disk0 geometry: 983/64/63 [3964928 sectors]
Sector size: 2048 bytes
Offset: 0 Signature: 0xAA55
Starting Ending
#: id cyl hd sec - cyl hd sec [ start - size]
------------------------------------------------------------------------
1: AF 0 1 1 - 1023 254 63 [ 63 - 153600] HFS+
2: AF 1023 254 63 - 1023 254 63 [ 153663 - 3657665] HFS+
3: AF 1023 254 63 - 1023 254 63 [ 3811328 - 153600] HFS+
4: 00 0 0 0 - 0 0 0 [ 0 - 0] unused
16GB iPod Touch:
Disk: /dev/disk0 geometry: 983/64/63 [3964928 sectors]
Sector size: 4096 bytes
Offset: 0 Signature: 0xAA55
Starting Ending
#: id cyl hd sec - cyl hd sec [ start - size]
------------------------------------------------------------------------
1: AF 0 1 1 - 1023 254 63 [ 63 - 76800] HFS+
2: AF 1023 254 63 - 1023 254 63 [ 76863 - 3811059] HFS+
3: AF 1023 254 63 - 1023 254 63 [ 3811182 - 76800] HFS+
4: 00 0 0 0 - 0 0 0 [ 0 - 0] unused
8GB iPod Touch:
Disk: /dev/disk0 geometry: 983/64/63 [3964928 sectors]
Sector size: 2048 bytes
Offset: 0 Signature: 0xAA55
Starting Ending
#: id cyl hd sec - cyl hd sec [ start - size]
------------------------------------------------------------------------
1: AF 0 1 1 - 1023 254 63 [ 63 - 153600] HFS+
2: AF 1023 254 63 - 1023 254 63 [ 153720 - 3657465] HFS+
3: AF 1023 254 63 - 1023 254 63 [ 3811185 - 153600] HFS+
4: 00 0 0 0 - 0 0 0 [ 0 - 0] unused
Be sure not to touch partition 1, otherwise you'll blow away your OS.
Once you've got it looking right, tell fdisk to write the new partition
table out. When it's finished, you'll need to sync from the command-line:
# sync; sync; sync;
Your third partition is now set up!
For some reason, disk0s2 gets moved to disk0s4 in /dev. You'll need to move
it back:
# mv /dev/disk0s4 /dev/disk0s2
# mv /dev/rdisk0s4 /dev/rdisk0s2
STEP 6: Restore /private/var
The partition change will have blown away /private/var, so you'll need
to restore it back to normal. To do this, format it and then extract
your tarball:
newfs_hfs /dev/disk0s2
mount -t hfs /dev/disk0s2 /private/var
cd /private/var
tar -xvf /private.tar
mv ./private/var/* /private/var && rm -rf ./private
STEP 7: Duplicate the OS partition
Here, you'll duplicate the OS partition (disk0s1) onto your newly
created partition (disk0s3). To avoid corruption, you'll first remount
your root as read-only:
# mount -o ro /
Next, use dd to copy the raw disk over:
# dd if=/dev/rdisk0s1 of=/dev/rdisk0s3 bs=4096
This will take several minutes. Once finished, it's a good idea to run
a fsck:
# fsck_hfs /dev/disk0s3
Now remount your root as read-write and mount the new partition:
# mount -o rw /
# mkdir /mnt
# mount -t hfs /dev/disk0s3 /mnt
STEP 8: Prepare the new boot partition
Once you have the new boot partition mouned, you'll need to make some
changes to it to boot.
1. First, edit /mnt/etc/fstab so that it mounts your root as /dev/disk0s3
instead of disk0s1.
2. Second, you'll need to make an ugly symlink hack. The upgrade process
checks for suspicious partitions by looking for the existence of
/sbin/launchd. If it finds it, the upgrade will fail. Fortunately,
the check mounts the partition in a subdirectory and doesn't chroot,
so if we move sbin to 'mysbin', and then link /sbin -> /mysbin, the
check will fail (because mysbin will actually be in /mnt), but the link
will work when the partition is mountd as root:
# cd /mnt
# mv sbin mysbin
# ln -s /mysbin sbin
NOTE: Make sure you link to /mysbin, not just mysbin
It's now safe to dismount /mnt
3. You'll also want to delete any Installer caches from /private/var:
# find /private/var -name Installer -exec rm -rf {} \;
STEP 9: Boot from the new partition
Three primary nvram values are used when booting the iPhone:
auto-boot (true): Determines whether the iPhone should auto-boot or go
into recovery mode
boot-partition (0): Identifies the partition number (zero-indexed) to boot
boot-args: (empty): Can be used to set the root device and verbose mode
Set these up so that the iPhone boots off of the new partition:
# nvram boot-partition=2
# nvram boot-args="rd=disk0s3 -v"
# nvram auto-boot=true
# sync
# reboot
To confirm that your iPhone is running off of the new partition, run
'mount'. This will print out your disk mounts. The root filesystem
should be mounted on disk0s3, not disk0s1.
If for some reason the device doesn't boot properly, you can attempt
botting with iPHUC:
# iphuc
#: enterrecovery (if necessary)
#: cmd setenv\ boot-args\ rd=disk0s3\ -v
#: cmd setenv\ boot-partition\ 2
#: cmd setenv\ auto-boot\ true
#: cmd saveenv
#: cmd fsboot
If for some reason you can't get the device to respond, try forcing it
into recovery mode by holding home + power until you see the
graphic telling you to "Connect to iTunes".
STEP 10: Upgrade to 1.1.4.
===> UPGRADE BACK TO 7.6 <===
In OS X, Version 1.1.4 can only be successfully upgraded by 7.6.
In Windows, iTunes 7.5 is adequate. Otherwise, you'll need to
temporarily upgrade to iTunes 7.6.
Upgrade iTunes back, then click 'Check for Updates'. This will prompt you
to download 1.1.4. Click 'Download Only'.
Once you've downloaded 1.1.4, use the 'Update' button (NOT "Restore").
This will update the OS partition only, without erasing all the work
you've done.
If iTunes didn't report a numeric error, then congratulations! You now
have an iPhone capable of booting multiple versions. You'll probably
still see the "Connect to iTunes" graphic on your iPhone. That will
be taken care of below.
===> DOWNGRADE BACK TO 7.5 <===
It seems like a pain, but iPHUC doesn't work with 7.6 (yet). If you
needed to upgrade to 7.6 above then now you'll need to downgrade back
to 7.5 to finish.
STEP 11: Use iPHUC to boot the 1.1.1 partition
Extract your 1.1.4 ipsw file. You'll see a kernel cache. Copy this to
the iPhone using iPHUC:
# iphuc
#: filecopytophone kernelcache.release.s5l8900xrb
Now issue the following iPHUC commands to boot. Be sure to escape spaces:
#: cmd setenv\ boot-args\ "rd=disk0s3\ -v"
#: cmd saveenv
#: cmd bootx
STEP 12: Mount the 1.1.4 partition, and set up shop
Once booted back into 1.1.1, you'll be able to mount the 1.1.4 partition:
# fsck_hfs /dev/disk0s1
# mkdir /mnt
# mount -t hfs /dev/disk0s1 /mnt
Be sure to fsck it first, as the iPhone won't let you mount it otherwise.
You're now set! You have full read-write access to 1.1.4 via /mnt. You can
change the master.passwd file, install OpenSSH, and install any
applications you want.
Be sure to also edit fstab to allow for a read-write root filesystem.
To set up MobileTerminal, you'll have to do a few things to accommodate its
running with non-privileged permissions:
0. Install the BSD_Base and BSD_Extras from http://iphone.natetrue.com
1. Copy Terminal.app into /mnt/Applications
2. mkdir -p /mnt/usr/local/arm-apple-darwin/
3. ln -s /usr/lib /mnt/usr/local/arm-apple-darwin/lib
4. cp -p /mnt/bin/bash /mnt/bin/sh
4. chmod 4755 /mnt/usr/bin/login
5. Edit /mnt/etc/master.passwd to put your own password in
When you're ready to boot back on 1.1.4, se nvram up:
# nvram boot-partition=0
# nvram boot-args=""
# nvram auto-boot=true
# sync
# reboot
That's it! You're now dual-bootable between both versions. You could
easily apply this to v1.2 (if you have it) or other firmware.
These are instructions on how to jailbreak
your 3G iPhone to the 2.1-2.2 iPhone firmware using QuickPwn for
Windows. Before beginning make sure you have restored to your desired
firmware version using iTunes.
Note*: If you are doing this for the 3G unlock and 2.2 is the latest firmware simply click Restore in iTunes before starting.
Step One
Create a folder called Pwnage on your desktop.
Download the following files in are product/download files
Extract the QuickPwn22.zip file to the Pwnage folder.
Step Two
Connect your iPhone to the computer and launch iTunes. 
Select your iPhone from the list of devices on the left. Now hold down shift and click the Restore button. Restore is preferred as it won't create any wasted space on your iPhone.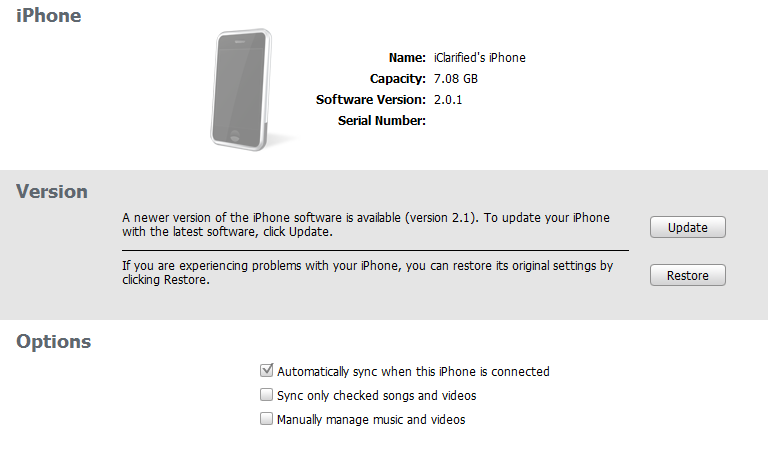
Navigate to the Pwnage folder on your desktop and select the 2.2 firmware ipsw. Click the Open button to continue. 
Step Three
Once iTunes has finished updating your iPhone to the 2.2 firmware you may launch QuickPwn.exe from the Pwnage folder on your desktop.
Step Four
Make sure you iPhone is connected to the computer and click the blue arrow to continue.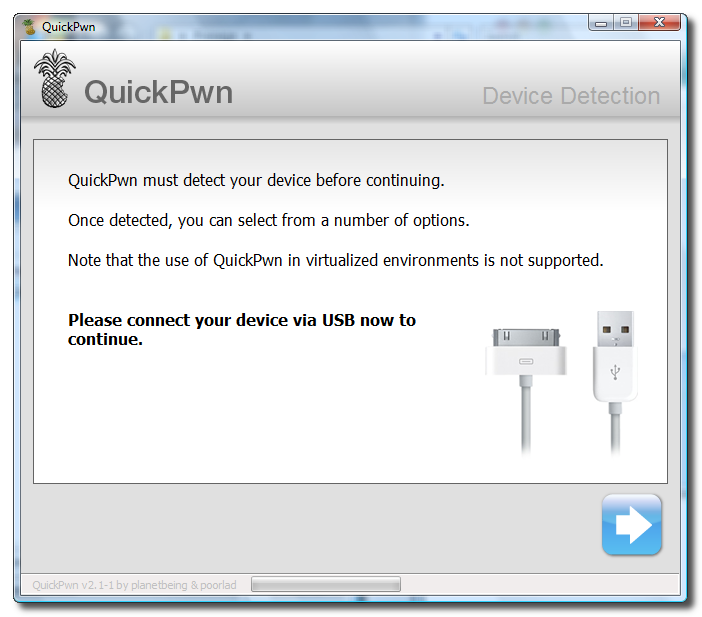
Step Five
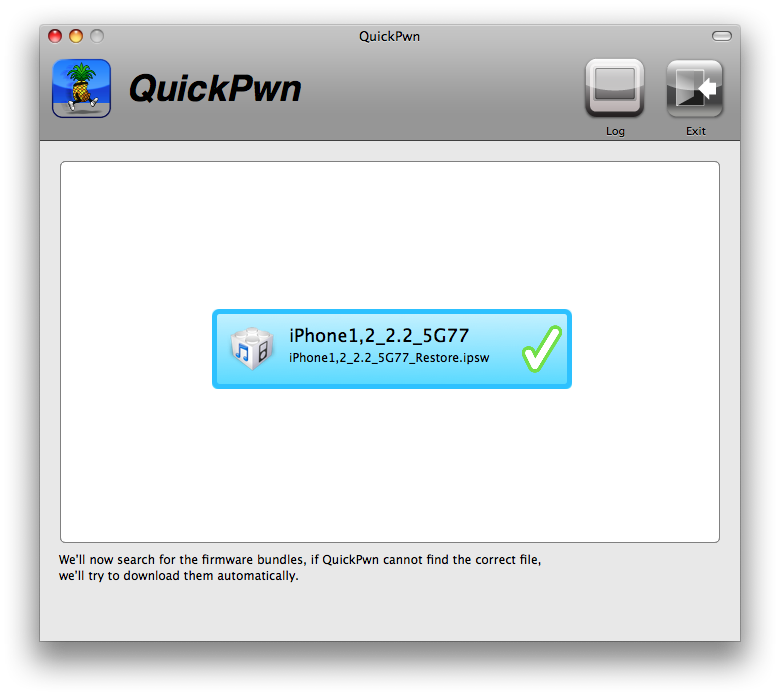
Click the Browse button to locate your iPhone firmware.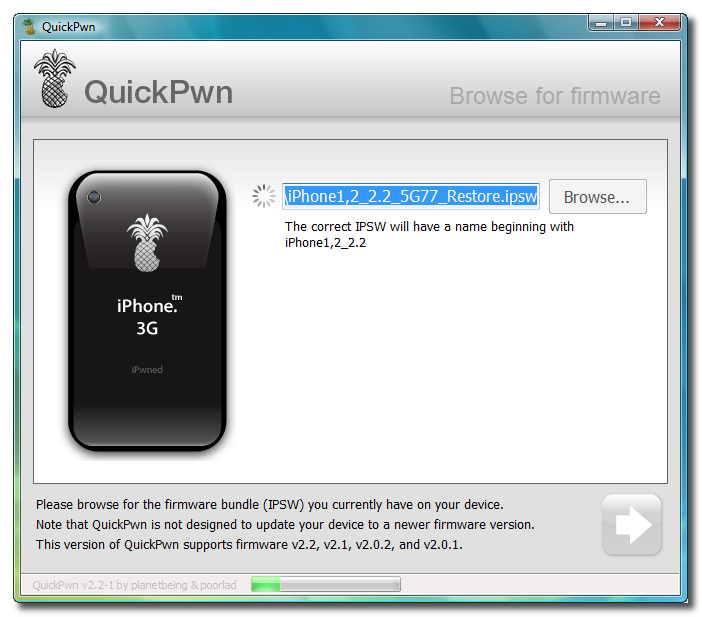
Step Six
Select the 2.2 firmware ipsw from the Pwnage folder on your desktop then click the Open button.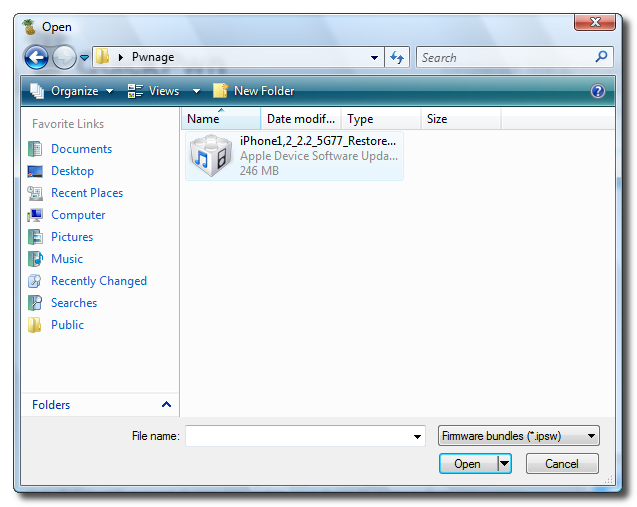
Step Seven
QuickPwn will check to make sure the ipsw is valid. Click the blue arrow button to continue.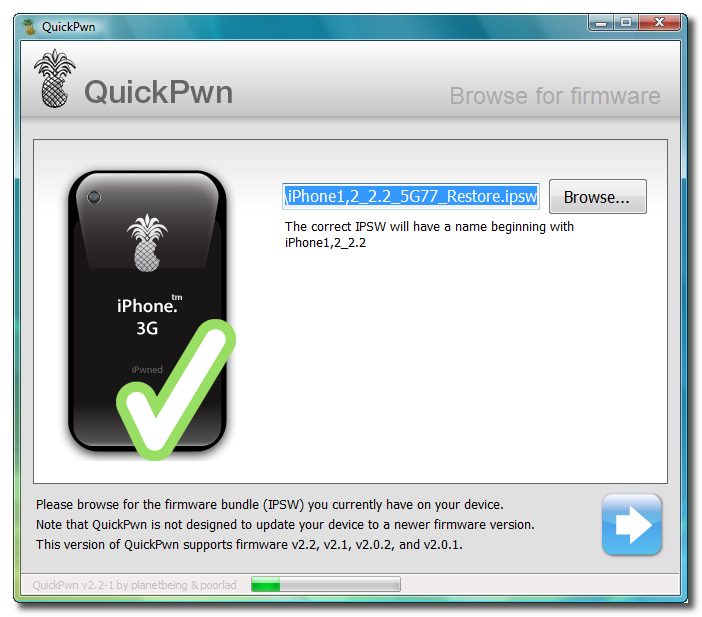
Step Eight
You
can now select whether to Add Cydia, Add Installer, or Replace Boot
Logos. Select the ones you would like to perform then click the clue
arrow button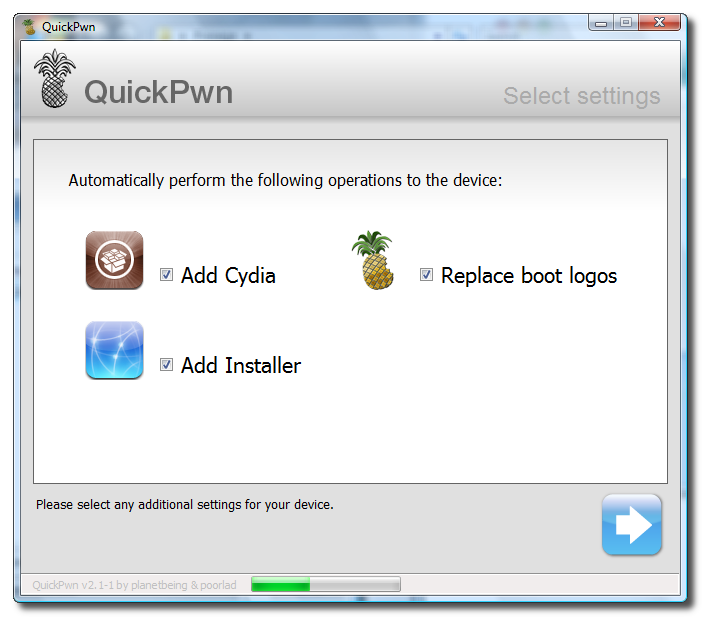
Step Nine
QuickPwn
will now ask you to confirm your iPhone is connected via USB before
continuing. Click the blue arrow button to proceed.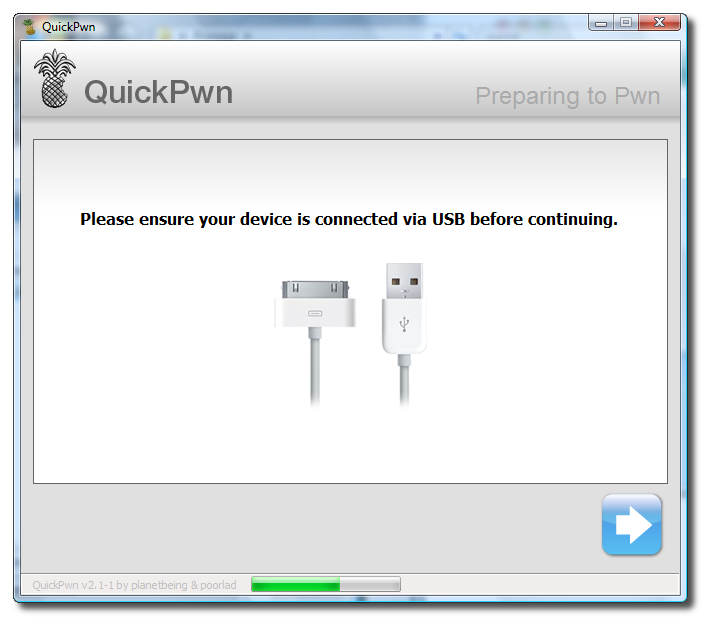
Step Ten
QuickPwn
will now automatically put your iPhone into recovery mode. Once its in
recovery mode you will be prompted to: Hold the Home button for 5
seconds, Hold the Home and Power buttons for 10 seconds, then release
the Power button and continuing holding the Home button until your
iPhone is in DFU mode.
Watch the prompts carefully and follow along.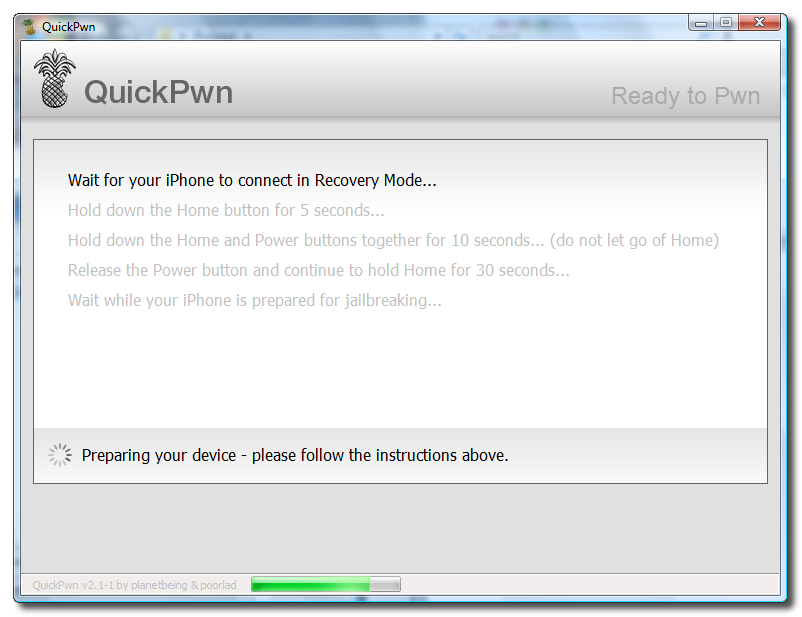
Step Eleven
Once QuickPwn detects your iPhone in DFU mode it will begin the jailbreak process.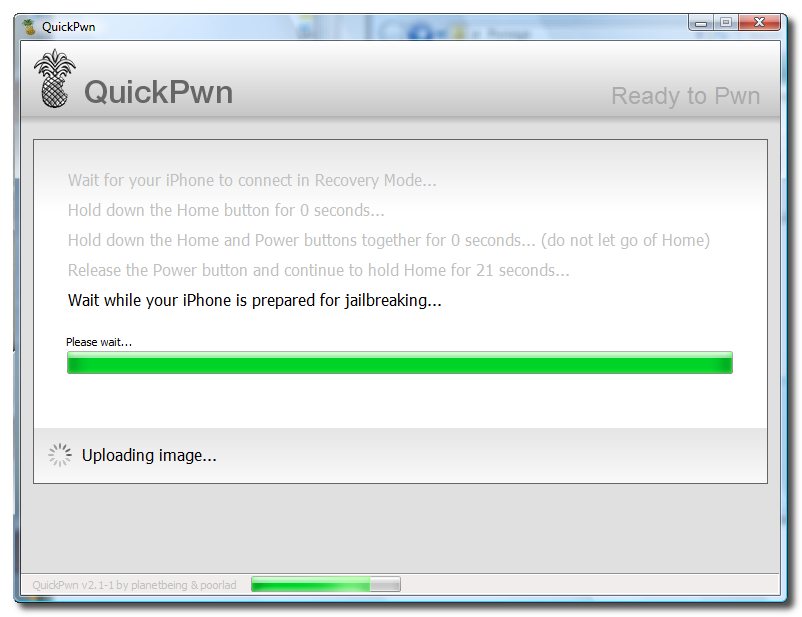
Step Twelve
Once jailbreaking is complete QuickPwn will inform you that it was successfull. 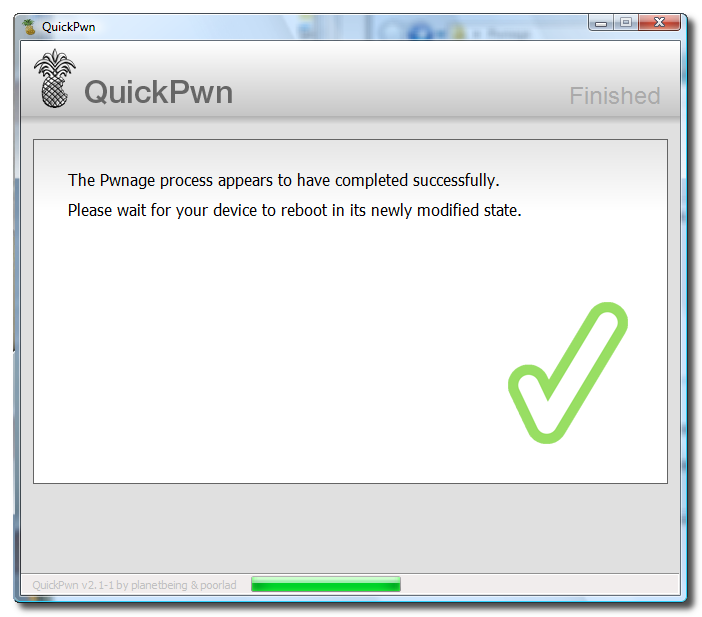
Note: You could use this tutorial as first step to unlocking the iPhone 2G. Simply complete this tutorial to jailbreak then install BootNeuter from Cydia to complete the unlock.
Step One
Create a folder on your desktop called Pwnage
Step Two
Download QuickPwn 2.2 from are download/product part
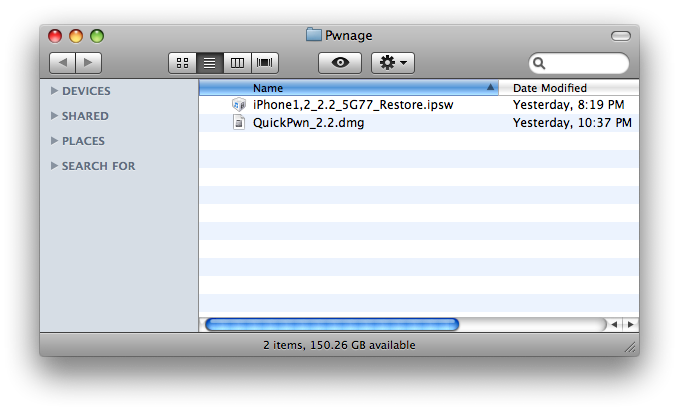
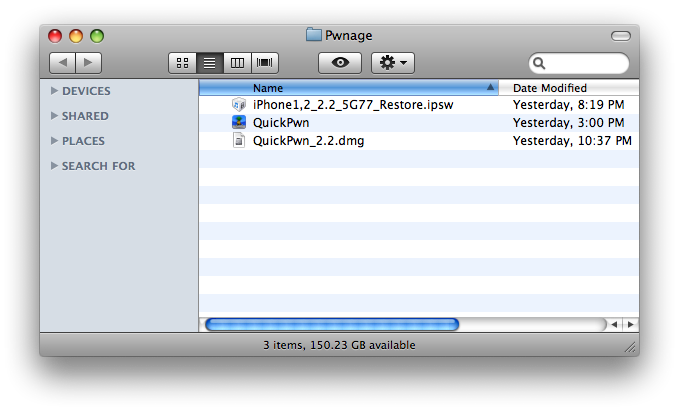
Step Three
Double click to mount the QuickPwn [QuickPwn_22.dmg] archive. Drag the QuickPwn application icon into the Pwnage folder on your desktop.

Step Four
Double click to launch QuickPwn from the Pwnage folder.

Step Five
Click OK to accept the copyright notice.

Step Six
Connect your iPhone to the computer when asked then click the OK button.

Step Seven
QuickPwn will now automatically detect the device connected!

Step Eight
QuickPwn will now automatically search for the latest firmware for this device
Step Nine
You will be asked if you would like to replace the original boot and recovery logos on your iPhone. Select Yes or No to continue.

Step Ten
QuickPwn will now begin building your custom IPSW.

Step Eleven
You will be asked to enter your administrator username and password. Do this, then click OK to continue.

Step Twelve
QuickPwn will now help you put your iPhone into DFU mode. First, turn off the device.

Next, you will be asked to hold both the Home and Power buttons for 10 seconds.

Finally, you will release the power button and continue holding down the Home button for another 10 seconds.

Step Thirteen
QuickPwn will now automatically begin sending information to your iPhone.

Step Fourteen
You will now be notified that QuickPwn is modifying your iPhone. The process will take some time and will cause the iPhone to reboot. Don't do anything until the process has completed!

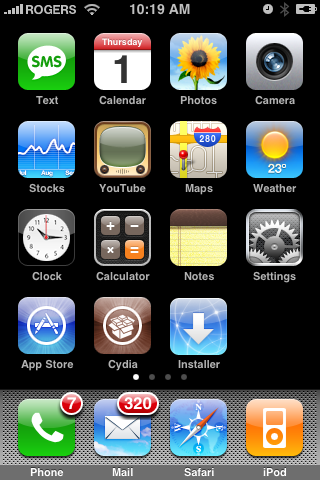
Step Fifteen
Once your iPhone has rebooted it will be jailbroken and have both Cydia and Installer on the Springboard!
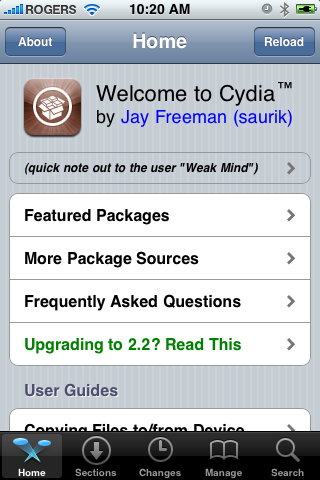
Step One
Press to launch Cydia Installer from your SpringBoard.
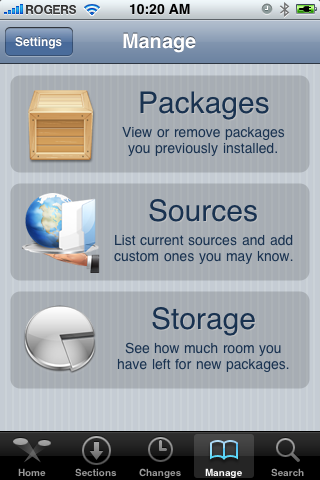
Step Two
Press to select the Manage tab at the bottom of the screen.
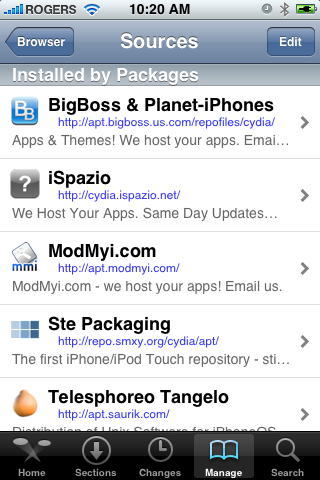
Step Three
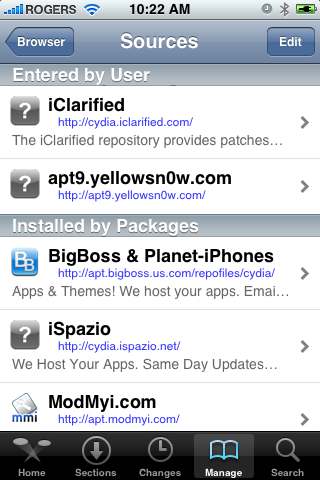
Press to select the large Sources button
Step Four
Press the Edit button at the top right of the screen.
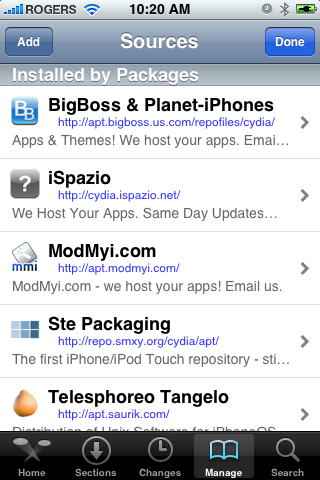
Step Five
Press the Add button at the top left of the screen.
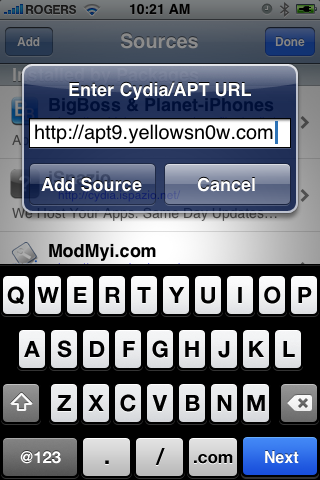
Step Six
Enter http://apt9.yellowsn0w.com/ as the source url and press the Add Source button.
Step Seven
Once the source has been added press the large Return to Cydia button.

Step Eight
Press the Done button at the top right of the screen.
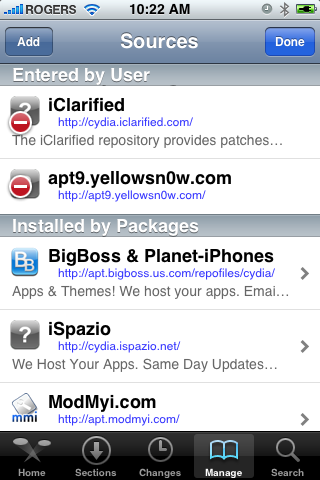
Step Nine
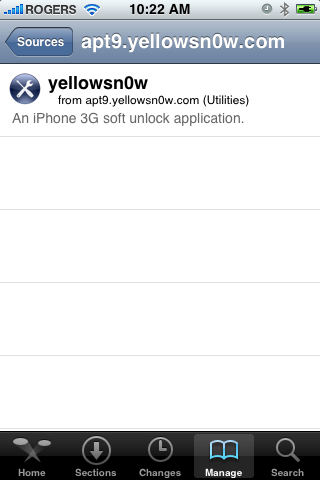
Press to select apt9.yellowsn0w.com from the list of user entered sources.
Step Ten
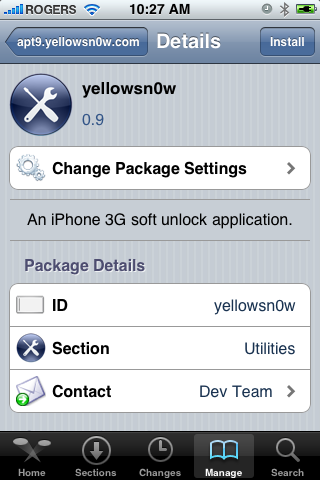
Press to select yellowsn0w from the list of packages
Step Eleven
Press the Install button at the top right of the screen.
Step Twelve
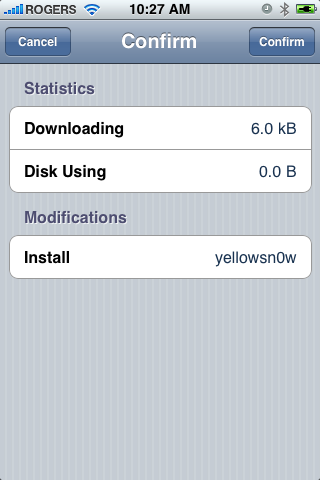
Press the Confirm button at the top right of the screen.
Step Thirteen
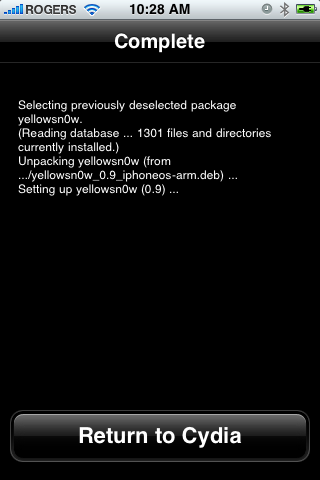
After installation completes successfully press the large Return to Cydia button.
Step Fourteen
Now press the Home button then power off and power on the iPhone. You do this by holding down the power button for 3 seconds then moving the power slider that appears to the right. Press the power button again to turn on the phone.


Step Fifteen
You should now be able to insert the SIM of your choice!
***HINTS: It seems that getting your iPhone to pick up your new carrier can be helped by turning off 3G and perhaps toggling the Airplane Mode switch on and off. If you are still having problems try removing and reinserting the SIM or booting with the new SIM already inside. Finally, you can also try to Reset Network Settings from the Settings:General:Reset Menu.
***IMPORTANT: For those having trouble. The yellowsn0w application can simply be uninstalled. If you have tried all the hints and suggestions and still have problems just use Cydia to remove the package and then reboot. You will then have service with your locked carrier as always.
***THANKS: A big thank you to all the members of the iPhone Dev-Team for all their hard work! It is much appreciated by all.
***UPDATES: The Dev-Team has made the following updates...
1. Soon you’ll see yellowsn0w 0.9.1 in the repos. It uses a much longer delay to let your SIM card initialize. If you have problems with 0.9.0, try this one and wait a full minute after you see homescreen, then reinsert sim card. We need both success and failure reports to tune this across the world, so please be patient (but please also report result!)
2. If you are in the U.S. and are trying this with T-Mobile, you must turn off the 3G switch in Settings. Also if you are good with the command line, you can make it much easier by adding the line
3. No PIN support yet. Remember how we said this was beta? Well we’re still working out the flow for SIMs with PINs enabled. Please disable any PIN you may have on that SIM before trying yellowsn0w, for now..